In the "Image to Terminal character" space this is also a known solution. Map characters to their shape and then pick the one with the lowest diff to the real chunk in the image. If you consider that you have a foreground and a background colour you can get a pretty close image in the terminal :D
Sorry for the confusion. The use-case is a little difference because the goal is to display the image as close to the original as possible with the limitation of only being able to use a forground color, background color and character per cell. The character is selected based on it's shape just like in the article. So if you get rid of the colors in Chafa you end up with something similar to the article. That's what I wanted to say :D
Cool, and thanks for the explanation. Gotten interested in retro software recently, so may actually be helpful for trying to set up pictures in some of the retro consoles. Most do tend to be limited to foreground / background. The stuff listed here [1] is pretty representative of what's being dealt with.
Note: If you happen to know how to do multi-color dithering with some of these that would actually make significant improvements on some of these old picture hardware tests.
Isn't your problem more about Color quantization than about dithering? If you have big character cells like in a terminal dithering won't help you much. For each cell you want to find the best shaped cell and a foreground and background colour that are the closest to a colour from the supported palette.
But maybe I didn't understand your real problem yet
Agree in the case of large character cells like a terminal. For those cases, where you only have something like 40x48 in the Apple II Low Res mode, there's only so much you can do with the limited resolution.
However, for many the result is that the color choices are akin to a posterization filter in photoshop, where the nearest color is simply chosen. Often, there's actually the freedom 'available' to define a character set and choose at least a background / foreground color, with some kind of dithering pattern.
Sometimes the character set that can be defined is limited, so it has to be chosen carefully. Yet there's improvement from a 'large blobs of color' poster result to a smooth dither tone change.
The problem with the quantization result, is it just snaps to the 'nearest'. So even for relatively large areas of slowly gradiating color, if you only have one 'nearby' color, everything inbetween just snaps to that single color choice. You might have red, with slowly increasing green / yellow, yet it will always just snap to solid red.
This example from the Vic-20 kind of shows that issue. Large areas where it posterizes severely.
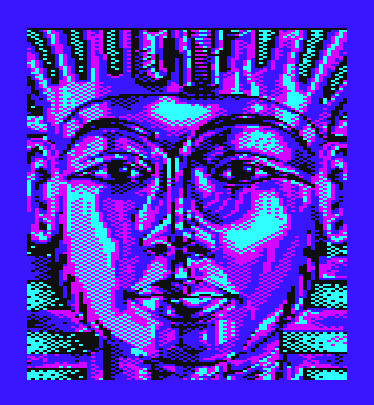
This example from the Vic-20 game Tutankarman shows that kind of approach. Varying amounts of dither and color used in dithing give the impression of changing skin tones.
https://hpjansson.org/chafa/
My go version: https://github.com/BigJk/imeji